Me and my colleagues have been participating in a bunch of Capture the Flag (CTF) events lately.
If you don’t know what CTFs are, they’re basically Information Security related contests where the participants must extract certain pieces of texts called “flags” from a bunch of computer-related puzzles in order to earn points. Usually, these puzzles are presented to the participants in a jeopardy-like format where the solution to each puzzle correspond to a certain amount of points for the participant (or team) skilled enough to extract the hidden flag. The puzzles are frequently sorted into categories which normally include Web, Reverse Engineering, and Exploitation. As with any contest, the individuals who gather the highest amount of points emerge victorious.
The latest one that we have joined was held by the Ekoparty Security Conference this last October 27-29, 2016.
We weren’t really planning on winning anything as we were mostly in it for the learning experience, and, I admit, that I’ve learned a lot of Information Security tricks (such as exploiting certain version of the Linux Kernel, buffer overflow attacks, tracking down a hidden Tor service using it’s SSH fingerprint, etc.) from these Capture the Flag events.
I usually didn’t author Write Ups for any of the CTF events that I have participated in before, but I believe that it would be a good idea to finally start doing so as engaging in the authorship of these write ups may help me preserve the important knowledge that I have gained from participating in these various CTF events.
Do note that I’ll only be writing about the puzzles that I have been able to solve in the CTF sponsored by the conference mentioned above. Also, please do note that my solutions may not necessarily be the best ones.
Table of Contents
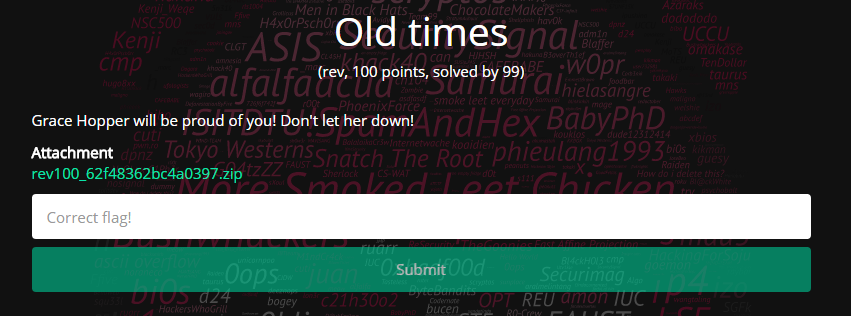
- Reversing 50 (F#ck)
- Reversing 100 (Old times)
- Pwning 25 (Ultra baby)
- FBI 100 (Find me)
- Web 150 (Carder)
Reversing 50 (F#ck)
[ Back to Table of Contents ] | [ CTF Time Write Up ]
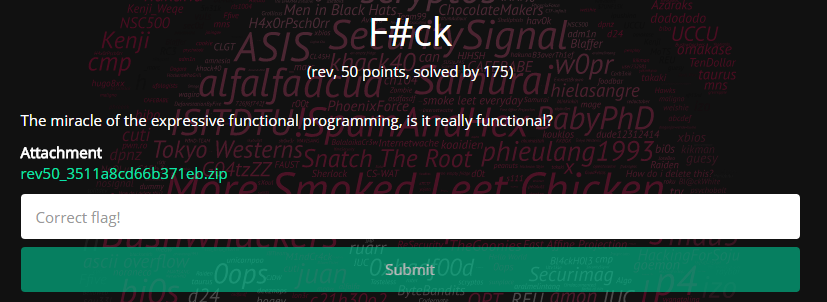
A wild inappropriately named reverse engineering challenge appears!
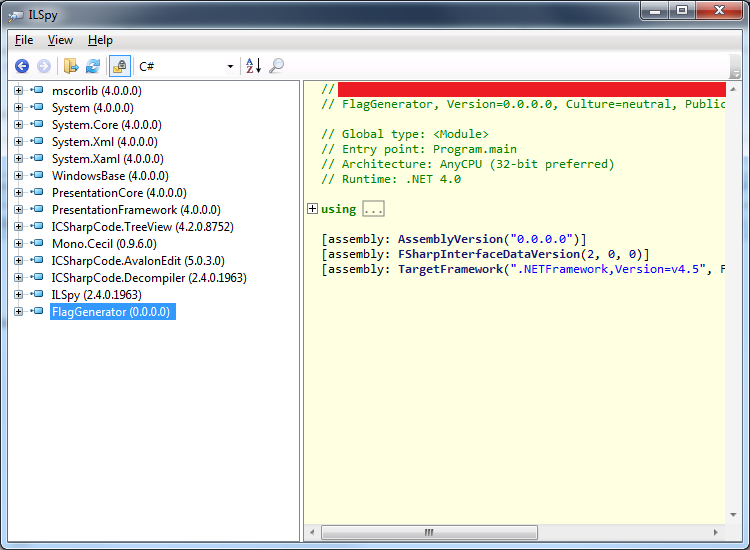
The attachment contains a single Windows executable file named FlagGenerator.exe. Upon closer inspection (via a text editor), one would see that the executable is a .NET assembly.
Requirements
- ILSpy (a .NET decompiler).
- Visual Studio
Process
- Open the
FlagGenerate.exefile with ILSpy
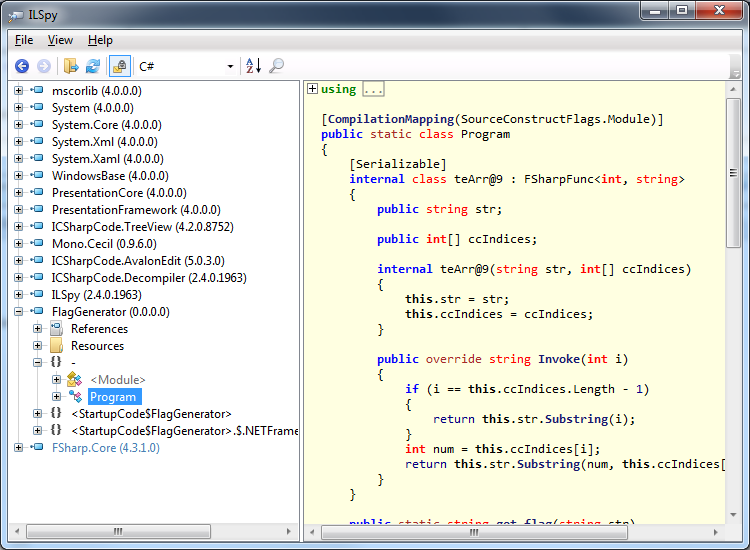
- View the decompilation for
FlagGenerator/-/Program
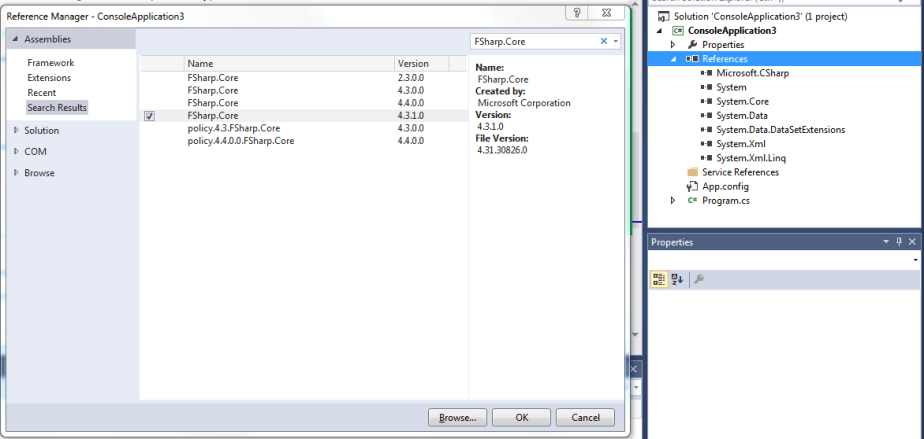
- Create a Visual Studio Project
- Add the
FSharp.Coreassembly to the References of your project
- Copy all of the imports in the decompilation to your project
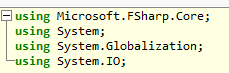
- Copy the entire
Programclass to your project

- Replace all instances of
teArr@9toteArrat9(or any other valid name) to suppress some of the syntax errorsBefore
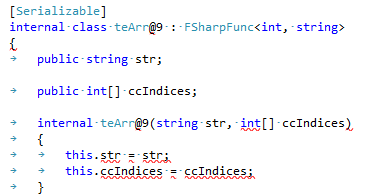 After
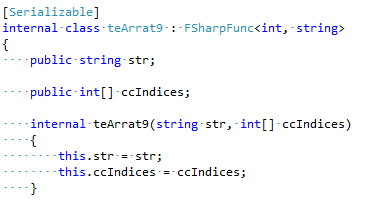
After
- Replace entire main method with a call to
Program.get_flag(“t#hs_siht_kc#f”)and and print of its return valueBefore
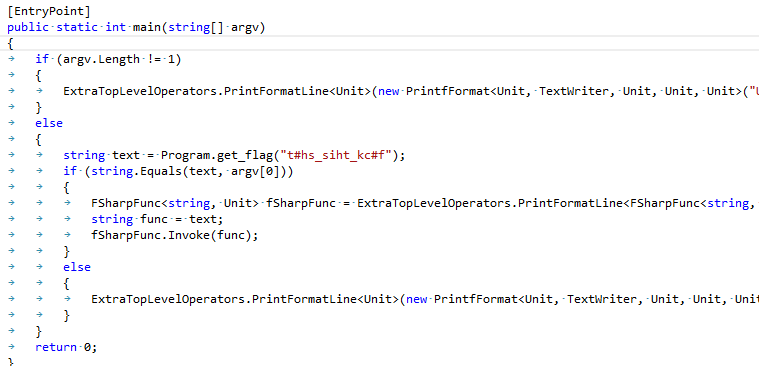 After
After

- Run the program, copy the output, and pass it as an argument to
FlagGenerator.exe
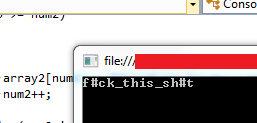

- The flag is
EKO{f#ck_this_sh#t}
Reversing 100 (Old times)
[ Back to Table of Contents ] | [ CTF Time Write Up ]
The attachment contains a single iSeries (AS400) Save File (SAVF). The challenge is pretty straightforward. You just need to explore the contents of the SAVF file using an appropriate viewer application in order to find the flag. For this challenge, I opted to use Julian Wong‘s ViewSavF program.
Requirements
- ViewSavF (an iSeries Save File viewer)
Process
- Open the SAVF file using ViewSavF
- Go to
Library/Part1/EKOPARTY(PF)/CHALLENGE1and you will find the flag there
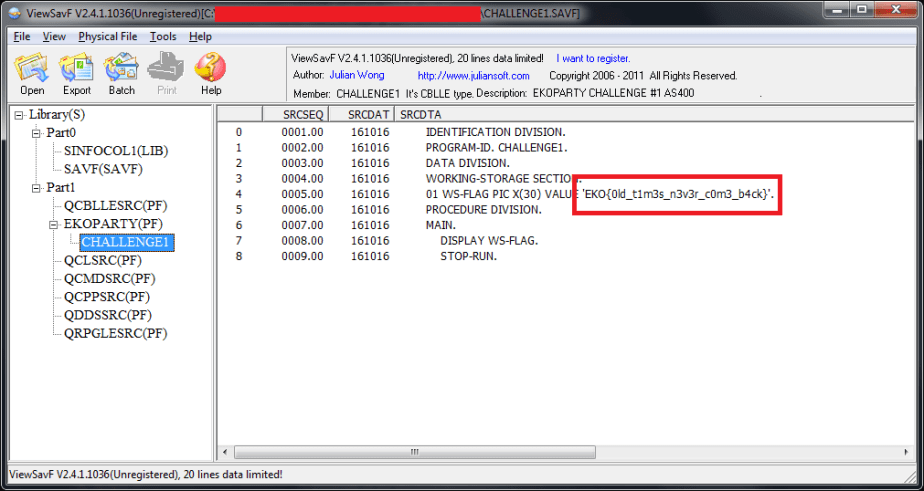
- The flag is
EKO{0ld_t1m3s_n3v3r_c0m3_b4ck}
Pwning 25 (Ultra baby)
[ Back to Table of Contents ] | [ CTF Time Write Up ]
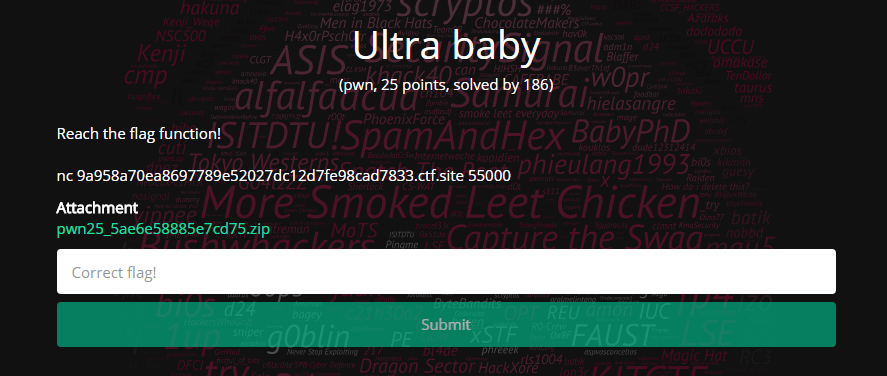
The attachment contains an ELF binary named ultrababy. This binary is similar to one being hosted as a service on the socket provided in the challenge’s description. The only difference between the two is that the binary included in the attachment contains a pseudo flag rather than the actual flag. This was probably done so that you can’t just look inside the binary strings of the attachment in order to find the flag. This setup forces you to actually attack the service being run on the provided socket.
Requirements
- REC Decompiler (a decompiler)
Process
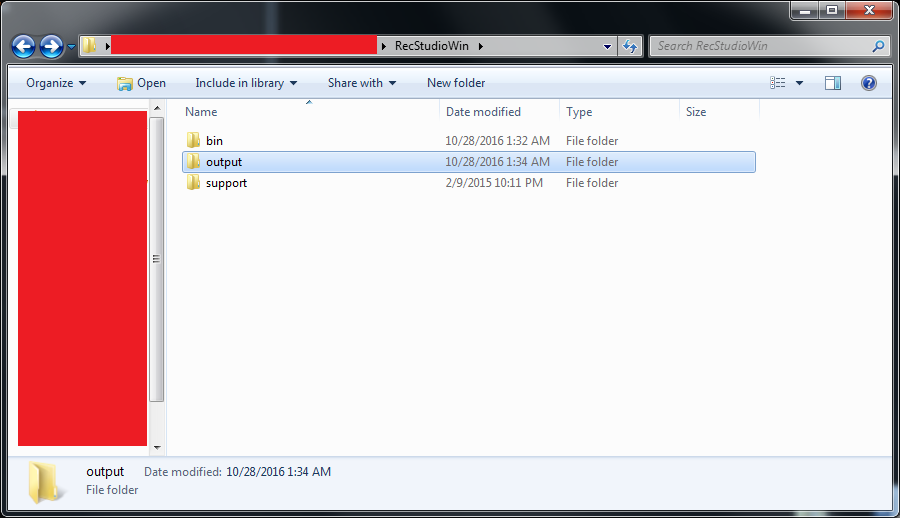
- Once you download the REC Decompiler, you will need to setup some additional things in the environment. The first one would be to create an
outputfolder directly under the extractedRecStudioWinfolder. Note that I’m using the Windows version of REC Decompiler if it wasn’t obvious.
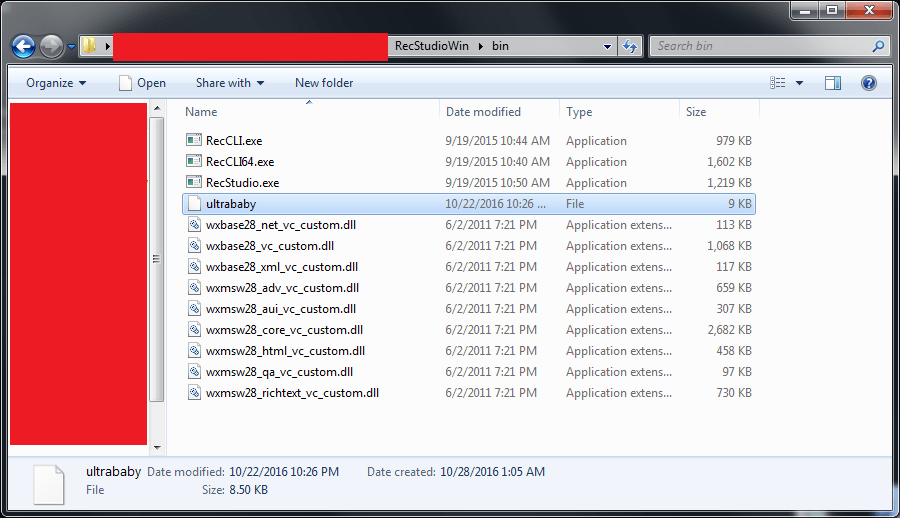
- Next, you will need to get the
ultrababybinary in a place where theRecCLI.exeprogram will be easily be able to access it. In my case, I simply movedultrababybinary inside thebinfolder – right beside theRecCLI.exeprogram.
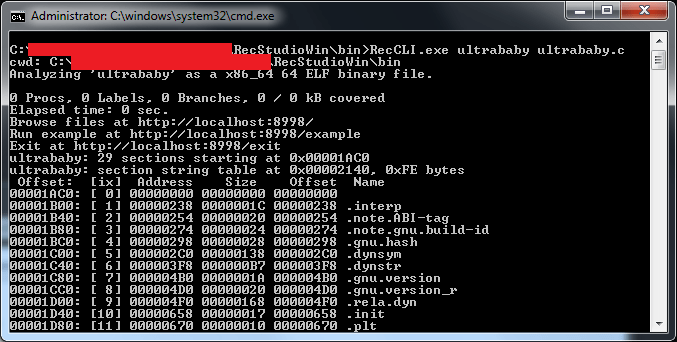
- Open a Command Prompt window and navigate to the
binfolder of your copy of REC Studio, and then executeRecCLI.exe ultrababy ultrababy.c
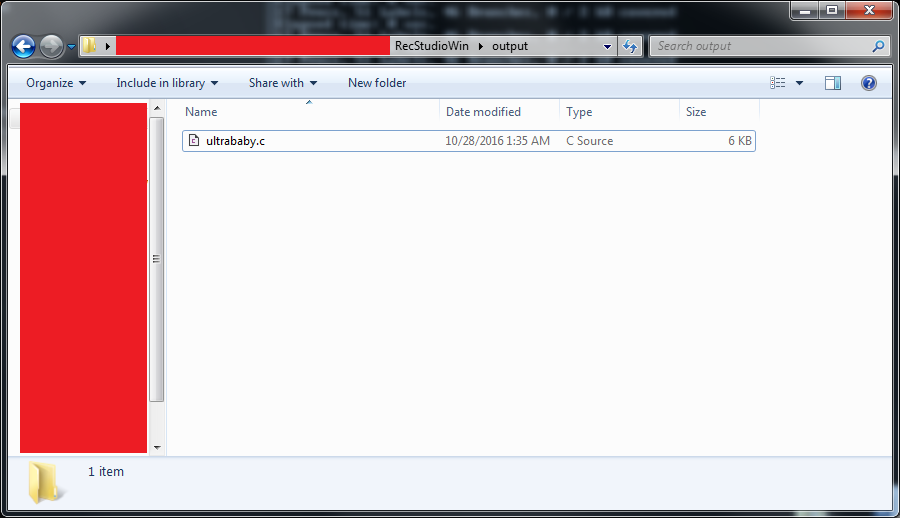
- The decompilation results for the
ultrababyELF binary will appear inside theoutputfolder you created earlier. The file name should beultrababy.c.
- Open the file using your favourite text editor and navigate to the segment shown below. This is the only segment which will be of interest to us.
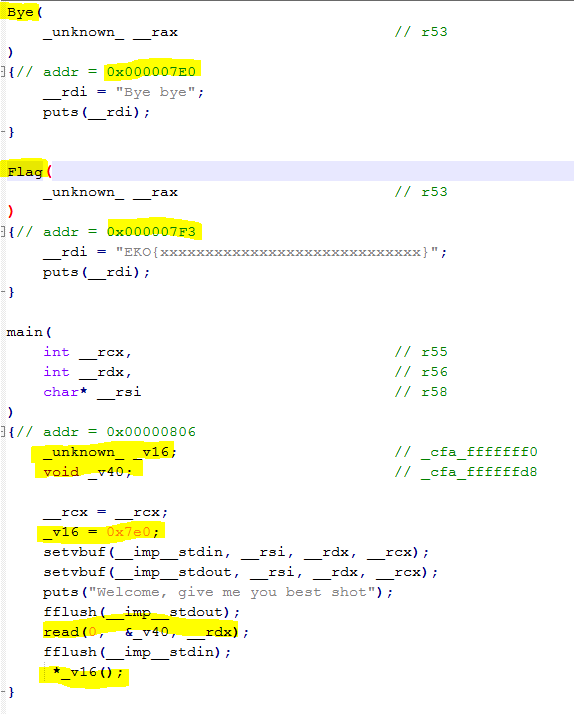
- We want to be able to call the
Flagfunction located at memory address0x000007F3. This function will print the flag directly onto the screen. If you’re wondering why we can’t just grab the flag right there, it’s because that’s only a pseudo flag. The real flag is on the binary running as a service on the socket specified in the description of the puzzle. This is still some pretty useful information however, as it tells us how our exploitation target operates. - Look at the
mainfunction. Specifically, look the at the call to the_v16function (it’s the last one) - Notice that
_v16isn’t really a function. It’s a variable. What happens there is that the program calls the function whose address is stored inside the_v16variable - If you look at the initialisation of the
_v16variable, you will find that it is assigned the value of0x7E0. This is the address of theByefunction. If we could change the value of_v16from0x7E0to0x7F3, then we would be able to call theFlagfunction which in turn will print the flag onto the screen. - Our point of attack shall be the
readfunction. What this function does is that it reads some string from the Standard Input (user input) and places the string onto the specified buffer (which in this case is the_v40variable). This function does not perform any bounds checking, so if we place an input that is larger than the size of the_v40buffer, the extra input will overflow onto the_v16variable. This will allow us to overwrite the contents of the_v16variable and call theFlagfunction. - At this point, we have no idea how big the
_v40buffer is, so we’re going to have to find out. To do this, we just feed an increasing number of characters into the Standard Input of theultrababyprogram until we get a Segmentation Fault.
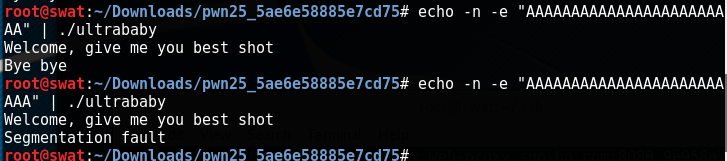
- Once we get a Segmentation Fault, we will know how big the
_v40buffer is. In this case, the program broke at 25 characters. This means that the_v40buffer is 24 bytes long. It broke at 25 characters because we accidentally wrote over the first byte of the_v16variable, and, as we remember, this variable is used by the program to call some function. If we place an invalid address there, the program will result in a Segmentation Fault. - We now know how big the
_v40buffer is (24 bytes), and we also know the address of theFlagfunction (0x7F3). The only thing we need to do now is to formulate a specially crafted input that we will feed into the Standard Input of theultrababyprogram in order to overwrite the_v16variable with the value of0x7F3. - For this task, we will use the
echocommand in Linux and pipe its output to the Standard Input of anultrababyinstance, but this time, we’re going to pipe it into theultrababyinstance running as a service on the socket provided in the description of the puzzle. - The command that we will use is
echo -n -e "AAAAAAAAAAAAAAAAAAAAAAAA\xf3\x07\x00\x00. The-nflag tells the echo command not to append an extra newline at the end of the string it will output. This is important because we need to be exact with the data that we will feed into theultrababyservice. The-eflag tells echo that it shall interpret backslash escaped characters. This is important because we want the\xf3\x07\x00\x00part of the data we’re feeding into the echo command to be transformed into the appropriate byte values (i.e. we want\xf3to be transformed into a byte with the value of0xf3rather than a literal “\xf3” string). We’re feeding the address in reverse order because addresses are commonly stored in little-endian format. This means that the higher part of the address is in a higher memory location and the lower part of the address is in a lower memory location. Meanwhile, strings are stored in such a way that the first character is in a lower memory location and the last character is in a higher memory location. This means that the lower part of the_v16variable will be written first, hence the reverse order of our input. - Lastly, we simply pipe our
echocommand into anetcatcommand which connects to theultrababyservice, and then we’ll have our flag.

- The flag is
EKO{Welcome_to_pwning_challs_2k16}
FBI 100 (Find me)
[ Back to Table of Contents ] | [ CTF Time Write Up ]
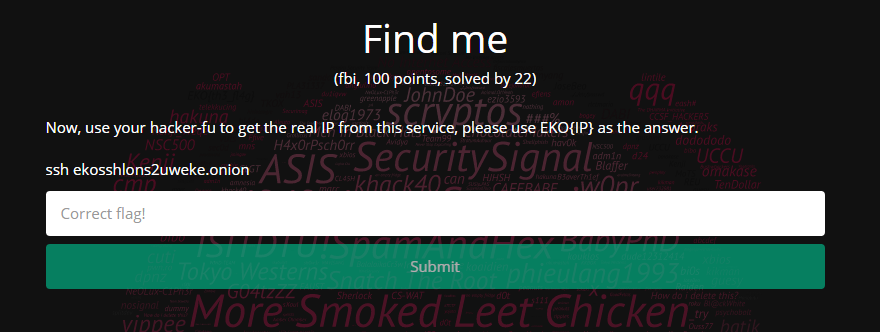
This challenge requires the participants to find the IP address of an anonymous hidden service accessible via the Tor network. This would be easy if we were in your ordinary internet environment, but in the Tor network, you can’t really do an nslookup or dig. The participants will have to find other ways to pinpoint the location of the service. Luckily, there is indeed a way, and it has something to do with searching for the banner of the service using one of my favourite search engines: Shodan.
Requirements
- tor
- git
- SSH Key Scanner
Process
- Install Tor on your Linux machine. In my case, I simply did a
sudo apt install torbecause I used a Lubuntu Virtual Machine. - Register a Shodan account and acquire your API key. It should be under your Account Overview.
- Clone SSH Key Scanner using git (
git clone https://github.com/0x27/ssh_keyscanner.git) - Open the
keyscanner.pyfile inside the cloned repository directory - Change the value of the
SHODAN_API_KEYvariable to your own Shodan API key - Run
torify python keyscanner.py -i ekosshlons2uweke.onion
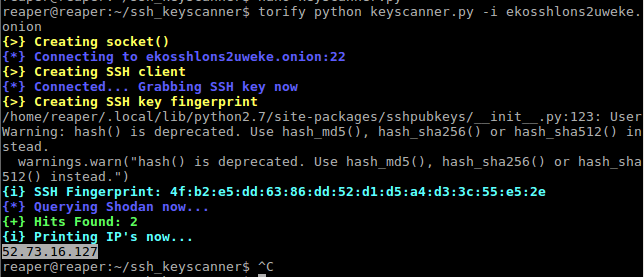
- What
keyscanner.pydoes is: it acquires a colon-separated MD5 hash of the SSH service’s public key called an “SSH Fingerprint” and then it searches Shodan for a banner containing that fingerprint. You can alternatively extract the SSH fingerprint of the service manually usingnmapand search for it in Shodan.
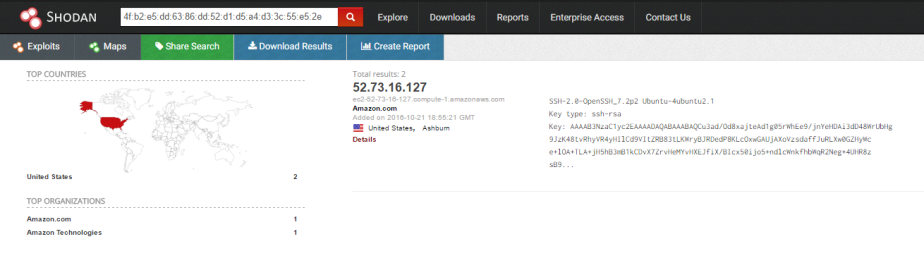
- The flag is
EKO{52.73.16.127}
Web 150 (Carder)
[ Back to Table of Contents ] | [ CTF Time Write Up ]
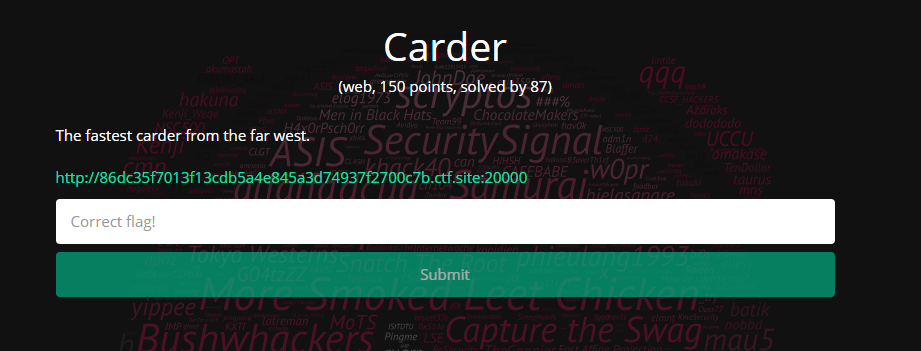
This is the last challenge that I was able to answer in the CTF event. This is a pretty straightforward challenge. You just need to provide three valid credit card numbers to the form presented in the page referred to by the description of the puzzle. You will have to do this in fifteen seconds or less so you have to prepare your “fast hands” game.
Requirements
- Python
Process
- Upon clicking the link presented in the description of the puzzle, you will be taken to a page asking for valid numbers for Visa, Master Card, and American Express credit cards. You have to provide the numbers within 15 seconds. The time frame validation is checked both at the client and server side so you can’t just change the HTML in the page after the time period has expired.
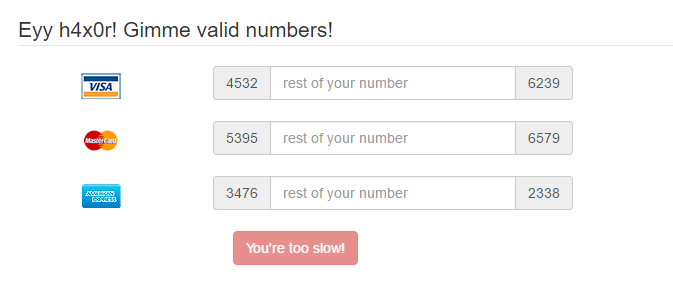
- The page already provides you with the first and last four digits of the credit card numbers that you need to provide. You just need to fill in the missing numbers in the middle. The next step will be determining how long the missing numbers are. Luckily for us, the form already tells us how many numbers are missing. This detail is important because once we start brute forcing for the appropriate numbers, we need to know how many zeroes we have to pad to our iterator. This will make sense in a while so please bear with me.

- Create a new Python script file and save it as
creditcard.py. This is the file where we’ll be writing our brute force script. - Paste the following function into
creditcard.pydef cardLuhnChecksumIsValid(card_number): """ checks to make sure that the card passes a luhn mod-10 checksum """ sum = 0 num_digits = len(card_number) oddeven = num_digits & 1 for count in range(0, num_digits): digit = int(card_number[count]) if not (( count & 1 ) ^ oddeven ): digit = digit * 2 if digit > 9: digit = digit - 9 sum = sum + digit return ( (sum % 10) == 0 )See: Python Luhn checksum for credit card validation (Python recipe)
- The code above essentially returns True if you give it a valid credit card number, and False if you give it an invalid credit card number
- Next. we’ll declare a
jobsarray right after the declaration of thecardLuhnChecksumIsValidfunction. This will contain the prefix and suffix of the numbers that we need to brute force as well as the length of the missing pieces in between those numbers.# list format: [missing_len, prefix, suffix] jobs = [ [5], [8], [7] ]For each array element in our
jobsarray, the first element shall be the length of the missing digits of the numbers, the second element shall be the prefix of the numbers provided by the web page, and the third element shall be the suffix of the numbers provided by the web page. I initialise the first element of each array with the length of the missing pieces of the numbers based on the information that we have gathered in step 2. As you can see from the lengths that I have provided, the first array will be representing the Visa number, the second array will be representing the Master Card number, and the third array will be representing the American Express number. I leave out the prefix and suffix fields because we’ll have to take those as inputs from the user. Unfortunately, we can’t just hard code the prefix and suffix values because they change every time you refresh the puzzle’s web page. - We will want to be able to quickly provide the prefix and suffix values to the program. Typing them in one by one just won’t do given the 15 seconds time window the puzzle provides us with, so that’s why we will want to be able to highlight and copy the values from the web page and then paste them into the program’s Standard Input. After highlighting the form in the web page, hitting
Ctrl+Cand pasting into a text editor, I can see that our program will be encountering the data in the following form:4556 rest of your number 1231 Mastercard 5242 rest of your number 3250 American Express 3423 rest of your number 0249 - As we can see in the form of the data that we will be providing to our program, we’re going to have to ignore the lines containing
rest of your numberand the card names. - Right after the declaration of the jobs array, add the following lines of code:
index = 0
for index in range(0, 10 + 1):
    line = raw_input()
    if index == 0 or index == 2:
        jobs[0].append(line.strip())
    if index == 4 or index == 6:
        jobs[1].append(line.strip())
    if index == 8 or index == 10:
        jobs[2].append(line.strip())
    index += 1
This will read the prefix of the numbers in lines
0,4, and8. Meanwhile, suffix number will be read from lines2,6, and10. - Next, we’ll be doing the actual brute forcing of the numbers. Go ahead and paste the following lines of code at the bottom of the segment where we acquire the user’s inputs.
for job in jobs:
    length, prefix, suffix = job
    for i in range(0, int(math.pow(10, length))):
        iteration = str(i).zfill(length)
        number = prefix + iteration + suffix
        if cardLuhnChecksumIsValid(number):
            print iteration
            break
So, what we’re doing here is that we go over all the jobs inside of our
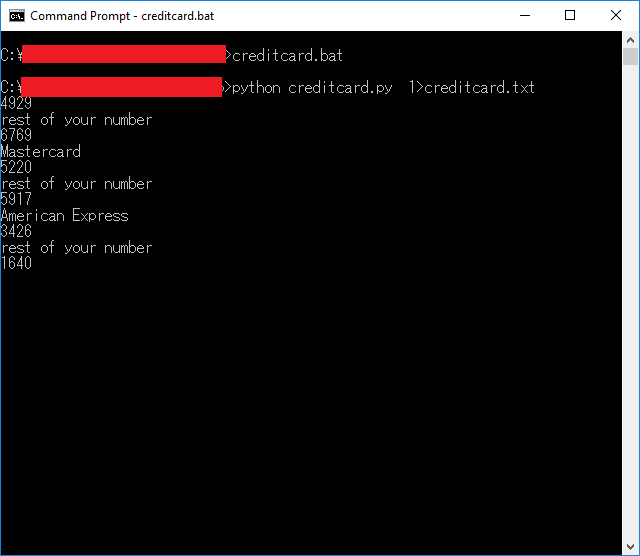
jobsarray, and then for each job, we acquire the length, prefix, and suffix of the current job, and then we iterate over all the numbers in the number space based on the length of the missing digits of the credit card number we are currently brute forcing. For each iteration, we pad our iterator with zeroes until the desired length is reached, and then we formulate the final credit card number to test by prepending and appending the prefix and suffix values respectively. After that, we check if the number is valid by using thecardLuhnChecksumIsValidfunction. If the credit card number is invalid, we simply move on to the next iteration. If the credit card number is valid, we print the valid onto the Standard Output, and then move on to the next credit card number to brute force. - Let’s test our script.
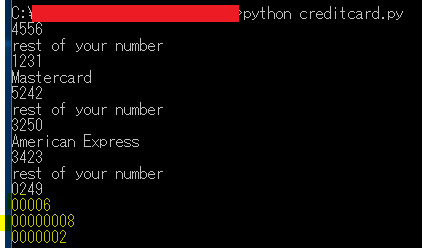
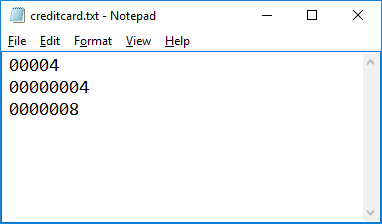
The highlighted parts are the output, and the rest is the input pasted from the web page. Make sure you hit the Enter key after pasting the input. The script can usually calculate valid credit card numbers in under 2 seconds. I use a high-end gaming rig so it might be a bit different for you. - Copying text from the Command Prompt window is difficult given the time constraint of the puzzle so we would want to have that output somewhere easier to copy from, hence, I piped the program’s output into a text file and opened that file using Notepad. For faster execution, write a batch script like the following:
python creditcard.py > creditcard.txt notepad creditcard.txt - Now prepare the Doritos and Mountain Dew because we’re gonna be doing some real MLG Quick Scoping action here. If you fail, start from this step again.

- Run the batch script I asked you to create earlier but don’t do anything yet once
creditcard.pyhas begun executing - Make sure that the web browser viewing the puzzle page is windowed. Move it right beside the Command Prompt window that the batch script is executing on. This will allow us to quickly copy from the web page and paste into the
creditcard.pyscript.
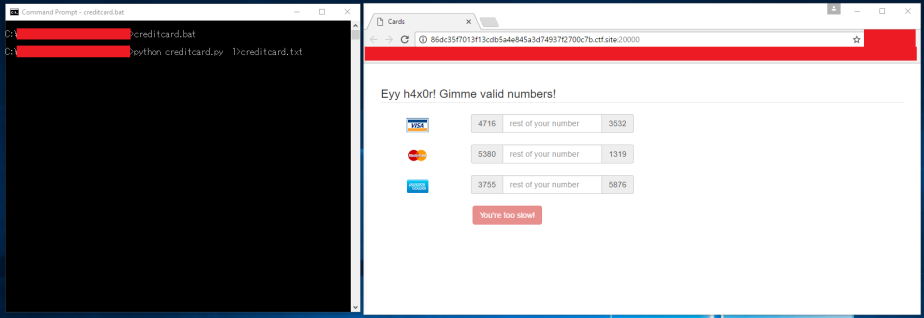
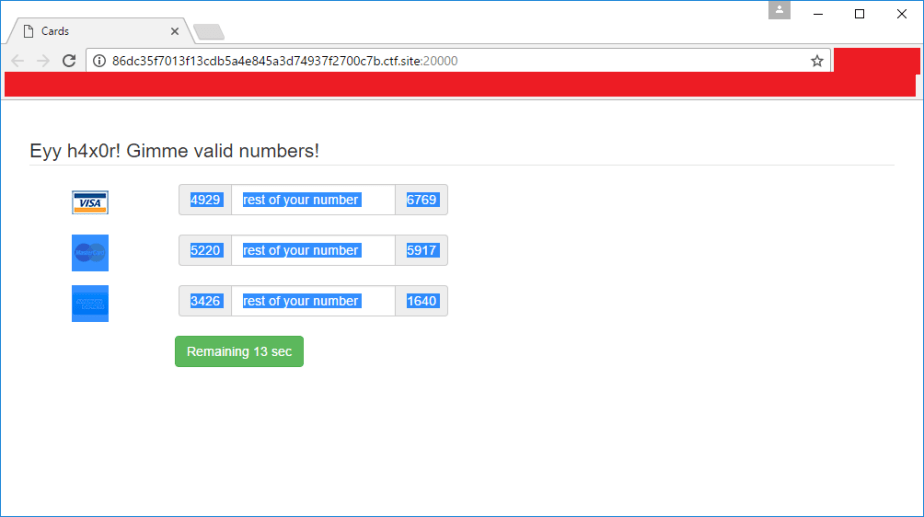
- Now refresh the page and quickly copy the information that we need from the web page like this:
- After that, quickly paste into the Command Prompt window running the batch script like this. In Windows 10, you just need to right-click. It might be a lot harder in older versions of Windows.
- Hit enter, and a Notepad window containing the numbers you need will pop up.
- Now paste those values into the puzzle web page before the timer runs out. Make sure you play your best Eurobeat track while doing this so you can attack those input fields at incredibly high speeds.

- Once you succeed, you’ll end up with something like the image below. If you fail, do as they say and “git gud“.
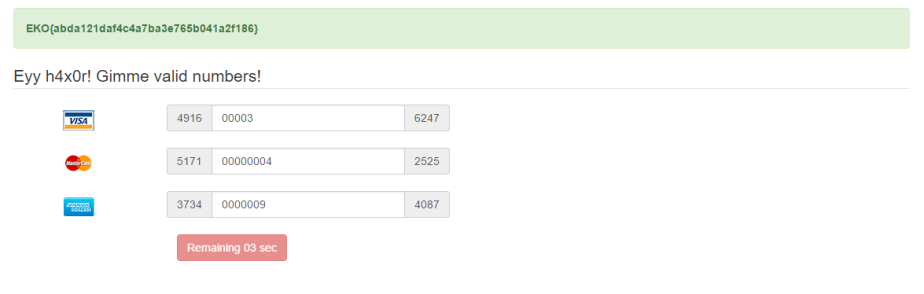
- The flag is
EKO{abda121daf4c4a7ba3e765b041a2f186} - Download the source code for
creditcard.pyhere
This concludes my write up for the Ekoparty Security Conference‘s CTF for 2016. I didn’t expect this article to become a meme show in the end, but I guess my nature got the better of me. Anyway, I hope you enjoyed the article.
Until next time!
